One of my favorite things to share is how to batch edit, and sync in Lightroom. Utilizing the “Sync” option in Lightroom allows me to batch edit many photos with similar settings in minutes. This saves me hours of editing. In this blog post, I will show you how to sync your settings across images in Lightroom.
To batch edit and synchronize photos with the similar location and lighting, you can simply select the images that you would like to sync in Lightroom and they will all reflect the settings you chose for the first image selected.




First, make sure you are in the Develop module in Lightroom. Select the image you would like to work with and adjust as needed. Keep this image selected by holding down Command.
Next, select all the images that you would like to add those settings to.
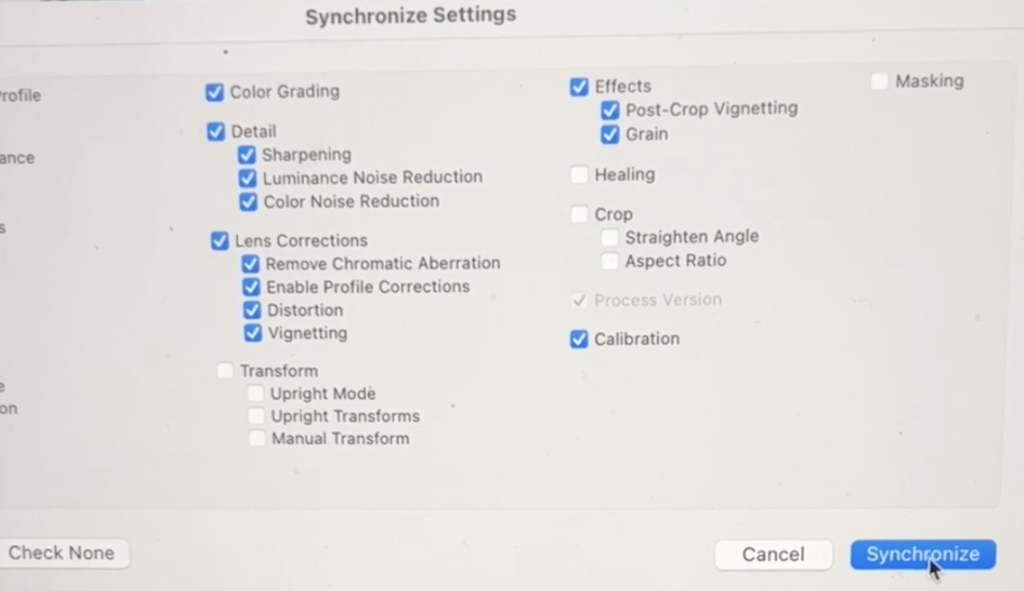
Now, click on the button in the lower right hand corner that says “Sync”. This will bring up a pop up menu called Synchronized Settings with a list all of the settings that are able to be synchronized. You may check or uncheck each setting, or use the Check All or Check None buttons. Select the settings you would like to synchronize across your images.
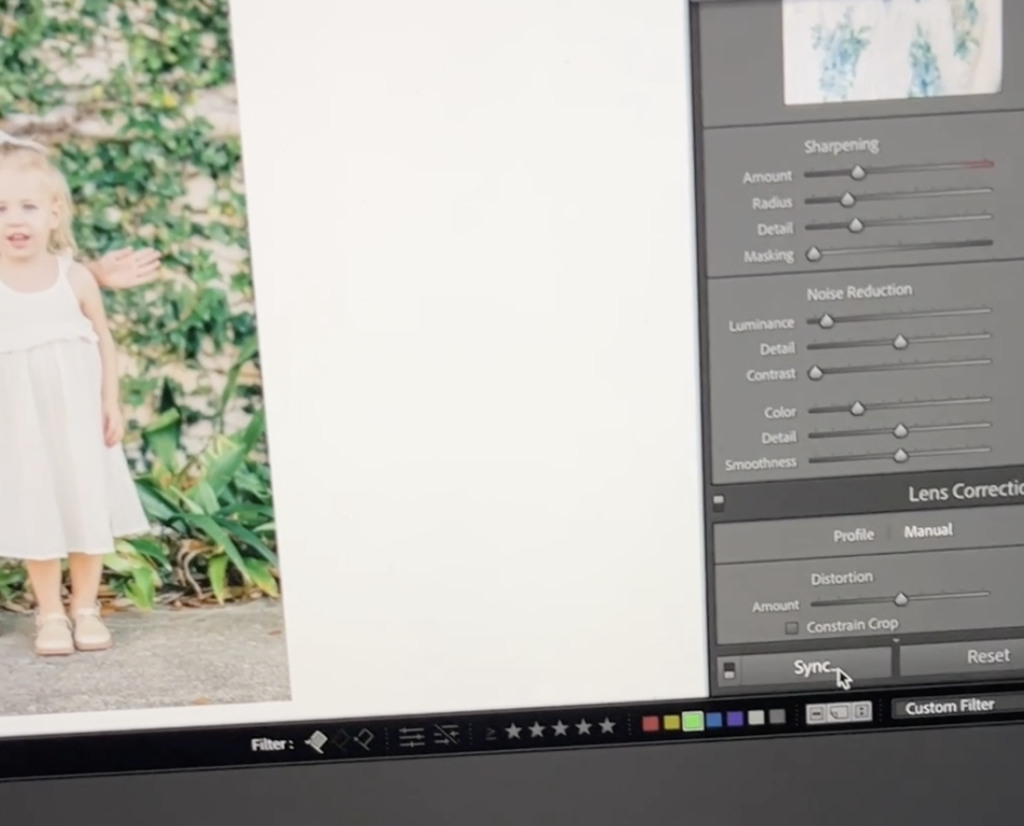
TIP: I usually keep Transformation, Crop, Healing, or Masking unchecked because these adjustments typically need to be a little bit different for each image.
Finally, click Synchronize in the Synchronize Settings menu.
All of the selected images will now reflect the same settings you adjusted on your first selected image!
Here is a quick video tutorial to walk you through how to batch edit in Lightroom:
Would you like to learn more about Lightroom or photography? Check out my Beginners Guide to Lightroom for more Lightroom tips and link here for free photography education on the blog, or sign up for my free guide The Magic of Film on Digital.


+ COMMENTS
add a comment