The image below is a little bit darker, straight out of camera, than I would usually deliver. For the final image, I wanted to preserve the sky and the water, while making the overall image a bit brighter.
While adjusting my exposure to make the image bright, I also need to make sure to preserve the highlights in my original image.
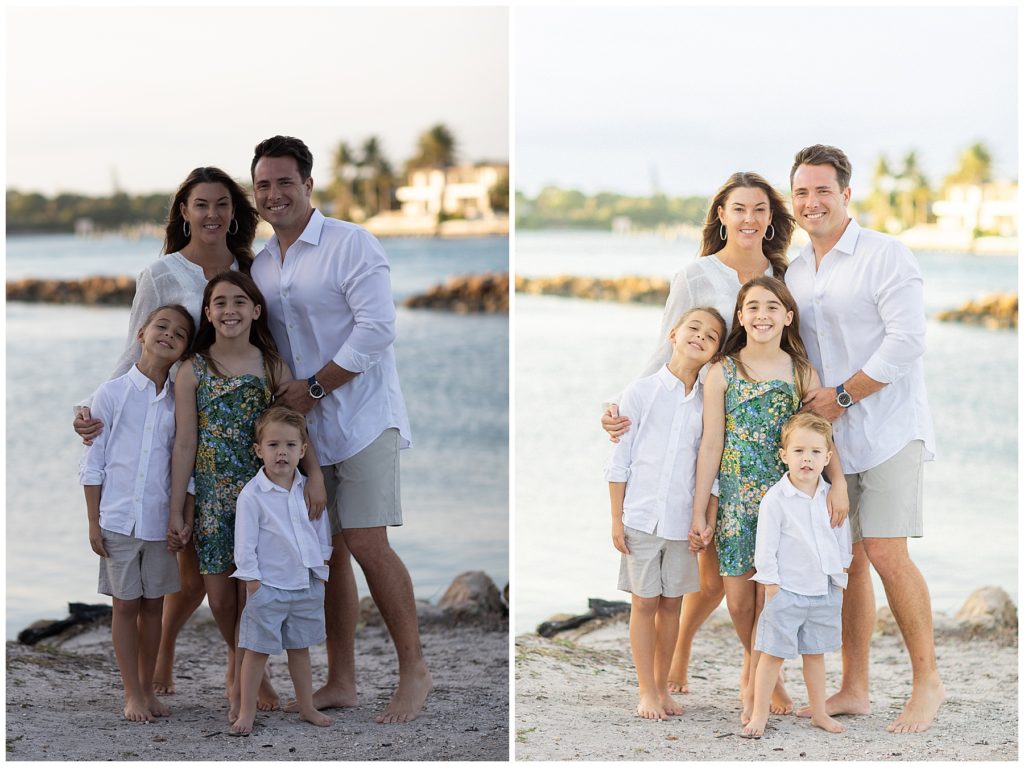
Lightroom Steps:
First, use the exposure slider on the right hand tool bar and to brighten your image. Pull the slider to the right, your numbers should increase.
Pro TIP: Hit the “J” key, to see any highlights that might be blown. These will appear RED when the “J” key is selected.
When a highlight is blown, that just means there will be no information in that area when the image is printed.
Be mindful of blown highlights in important areas of your image such as faces, skin, and large portions of your background. When images are printed, the areas where highlights are blown will be completely white since there is no data to be read by the printer.
Pro TIP: Most cameras have a highlight setting that you can turn on to see if you are blowing out highlights in camrea. It is often safer to underexpose digital images in camera, than to overexpose them!
In Lightroom, you can take down the highlights and the whites with the sliders. This will often help in areas where highlights are blown.
Click on the video below to see exactly what I did in my Lightroom edit:
Do you want more photography and editing tips? Check out the blog for free education, or sign up for my free guide The Magic of Film on Digital.



+ COMMENTS
add a comment